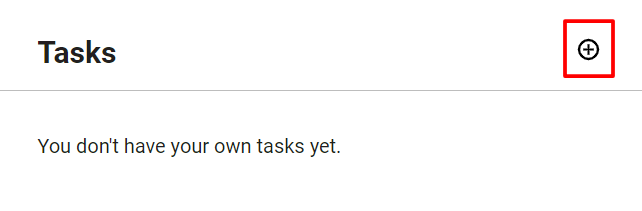
Initiate the task creation process effortlessly by utilizing the "plus" button located on your dashboard within the dedicated "Tasks" block. This simple yet powerful feature allows you to seamlessly add a new task and kick-start your productivity.
Once you've clicked the "plus" button, you'll be prompted to set up the specifics of your task. Begin by assigning a name to the task, providing a clear and concise title that encapsulates its purpose. Following that, include a detailed description to capture any additional information or context necessary for the task's completion.
To create a new task, follow these simple steps:
- Name and Description: Set up the task by providing a name and a detailed description, ensuring clarity on its purpose and requirements.
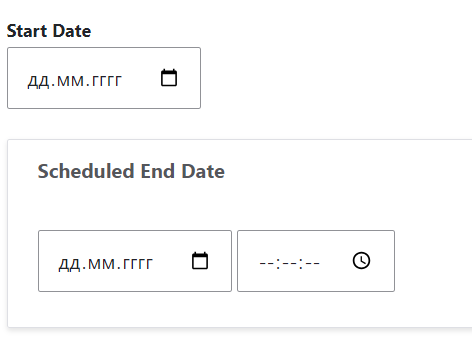
Start and End Dates: Specify a start date for the task, and schedule its end date to establish a clear timeframe for completion.
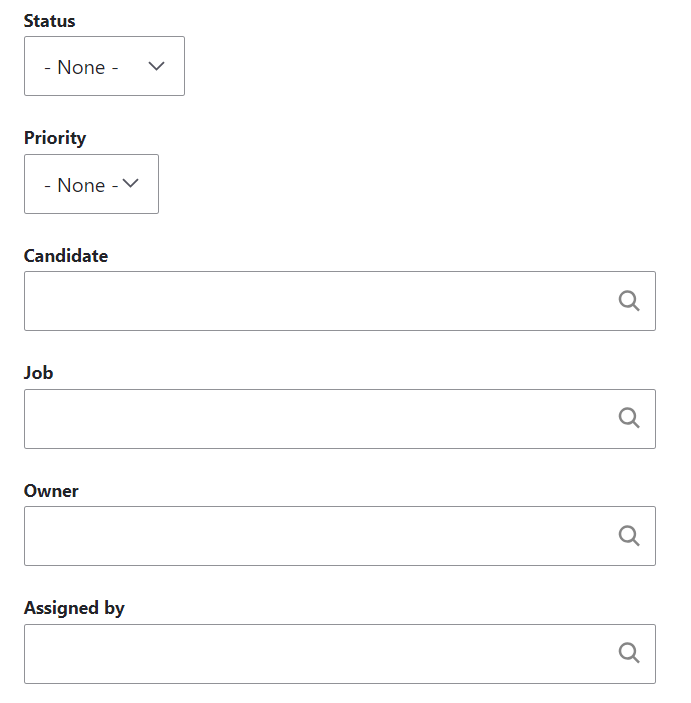
- Status Options: Choose a status for the task from the available options - Open, In Progress, Complete, or On-Hold.
- Priority Setting: Set the priority level for the task to prioritize and organize your workload effectively.
- Candidate and Job Selection: Associate the task with a specific candidate and job to maintain contextual relevance.
- Team Ownership: Choose an owner from your team who will be responsible for overseeing and managing the task.
Assignment: Indicate the team member to whom the task will be assigned for execution.
- Save Changes: Once all necessary details are filled out, save these changes to formalize the task in the system.
This streamlined process ensures that you not only create tasks with ease but also equip them with the essential details needed for effective execution. Take control of your to-do list and enhance your task management experience with these straightforward steps. Let's get started on your journey to organized and efficient task handling!