Adding a New Lead
Introduction
This document provides a step-by-step guide on how to add a new lead on the site. To streamline the process, a dropdown menu on the side navigation is used. Follow the instructions below to successfully create a new lead and populate the required fields.
Prerequisites
- Access to the site with the necessary Role to add leads (Sales or Business Development).
- Familiarity with the dropdown menu on the side navigation.
Steps to Add a New Lead
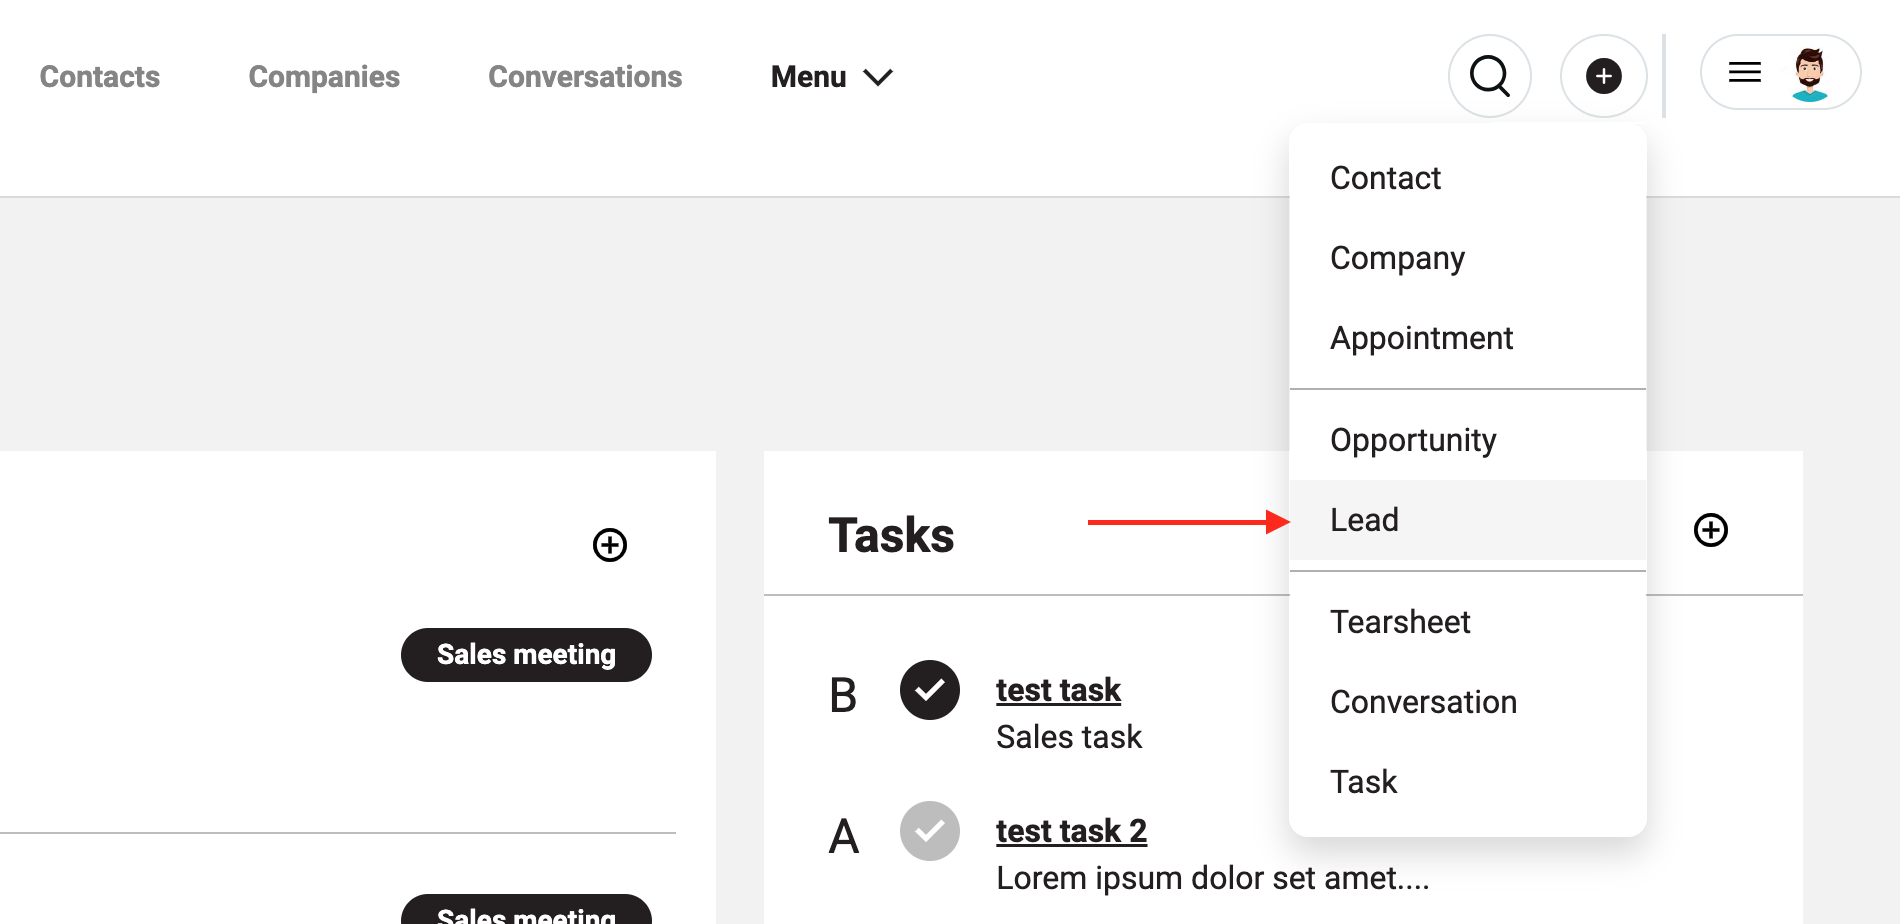
- Navigate to the Add Menu (far right), and select the Lead Option:
- Locate and click on the "Add Lead" option in the dropdown menu on the side navigation.
- Enter a Title:
- Enter a title for your Lead in the designated "Title" field - (e.g. Opportunity at XYZ Company)
- Add Contact:
- Choose a contact for this Lead.
- If the contact is not yet available, click on the "Add Contact" button.
- A pop-up window will appear, allowing you to enter details for the new contact.
- Add Company:
- Choose a Company for this Lead.
- If the company is not yet available, click on the "Add Company" button.
- A pop-up window will appear, enabling you to enter details for the new company associated with the lead.
- Select Owner:
- Choose the owner of the lead from the available options (you or another team member).
- Choose Status:
- Select the appropriate status for the lead from the dropdown menu.
- Options: Converted, New Lead, Qualified, Non-Responsive, Non-Interest.
- Select the appropriate status for the lead from the dropdown menu.
- Specify Lead Source:
- Choose the lead source from the available options.
- Options: Email, Event, Reference, Referral, Social, Website.
- Choose the lead source from the available options.
- Enter a description:
- Enter a description for the job position in the "Overview" field.
- Select Domain Access:
- Choose one or both of the options: Aura ATS, Aura Jobs ATS.
- You can only select one or both of these options.
- Choose one or both of the options: Aura ATS, Aura Jobs ATS.
- Publishing Options:
- If you want the lead to be visible to all members, check the "Published" checkbox.
- Save the Lead:
- Once all the necessary information is entered, click on the "Save" button to add the lead.
Conclusion
Effectively utilizing Leads in Aura CRM/Sales is integral to the success of your sales efforts. By understanding the components of a Lead and following the steps outlined in this documentation, you can efficiently manage and nurture potential business opportunities, ultimately driving success in your sales pipeline.